Skip to content


Accent walls are a popular way to add a touch of personality and style to any room. They allow homeowners to experiment with bold colors, textures, and patterns without overwhelming the space.
However, creating an accent wall can be costly, especially if looking for a high-end look. So in this step-by-step guide, we'll show you how to create a high-end-looking accent wall with slat panels on a budget.
From preparing the wall to installing the panels and finishing the project, this guide will provide you with all the information you need to transform any room in your home.
Materials needed
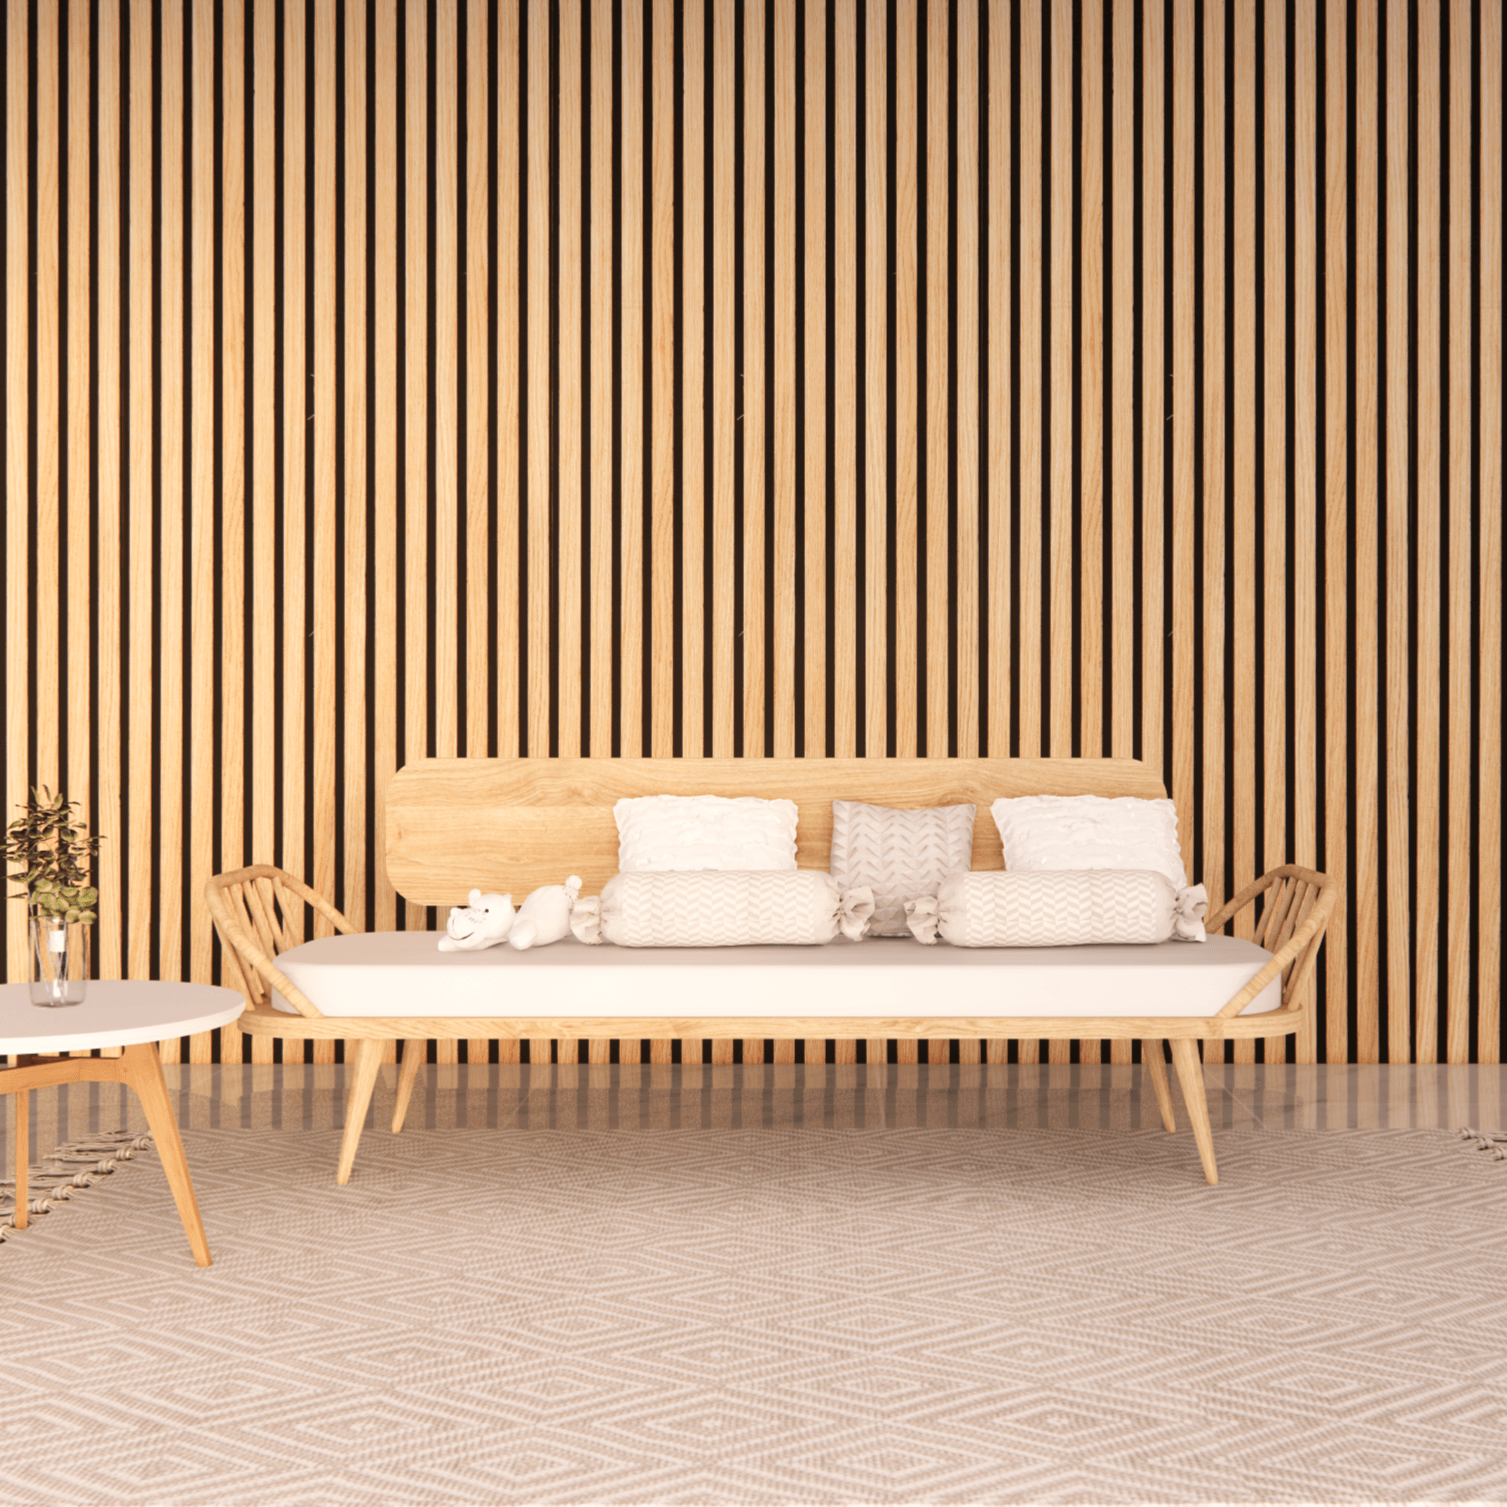
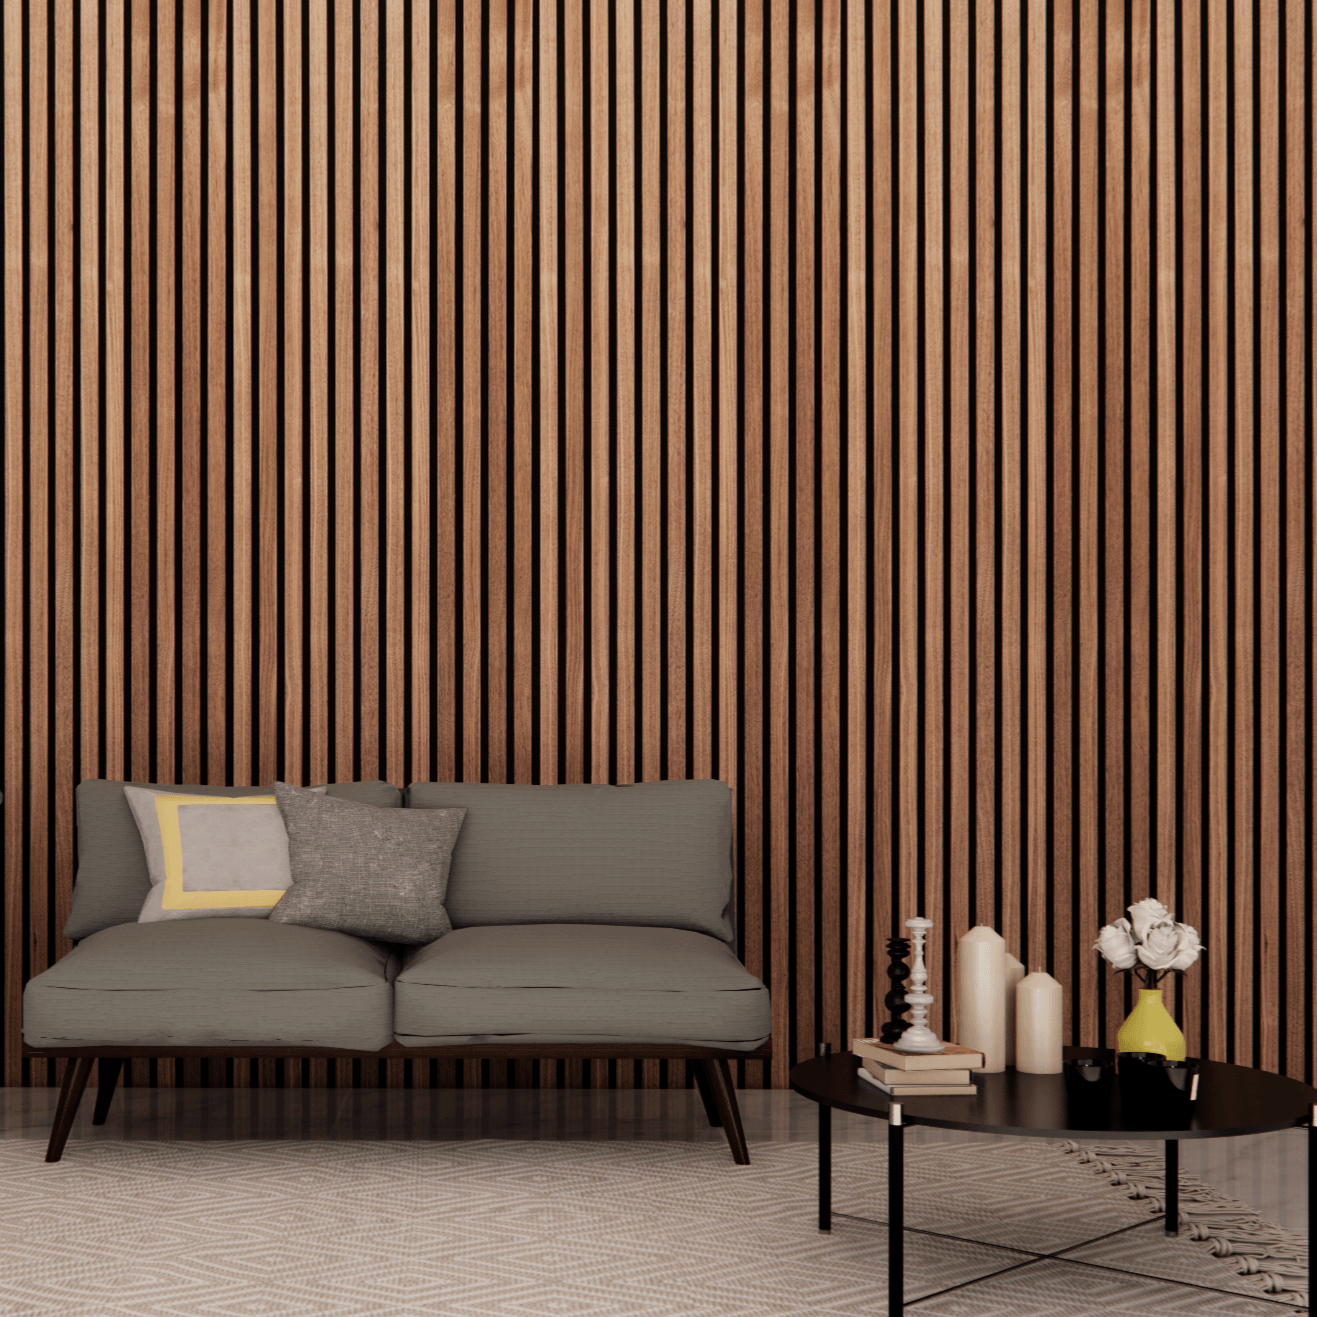
- Slat panels: These will serve as the primary material for your accent wall. They come in various colors and finishes to match your desired aesthetic.
- Adhesive: We recommend using a strong adhesive to secure the slat panels to the wall. Make sure to choose the appropriate adhesive for your wall material.
- Nails: While adhesive will do most of the work, nails can provide extra support and stability. Your nails should be long enough to penetrate the slat panels and into the wall.
- Sanding block: You'll need a sanding block to smooth rough edges or surfaces before painting.
- Painting supplies: Depending on your desired finish, you may need paint, brushes, or rollers to apply the finishing touches to your accent wall.
- Posh Wood slat panels are all pre-finished and come in four beautiful variations: Charred Oak, Posk Oak, Posh Oak with Grey Felt, and Posh Walnut.
- Caulk: Caulk can fill gaps between the slat panels and the wall. The material also helps create a seamless look and prevents drafts from entering the room.
Preparing the wall
Before installing the slat panels, it's essential to properly prepare the wall to ensure a smooth and even surface. Follow these steps to prepare your wall:
- Remove any existing wall coverings, such as wallpaper or paint. Use a scraper or sandpaper to smooth out any remaining bumps or rough spots.
- Clean the wall thoroughly to remove any dirt, dust, or debris. Use a damp cloth to wipe down the entire surface.
- Fill in any holes or cracks in the wall using a spackle or joint compound. Allow the mixture to dry completely, then sand the surface until smooth.
- Apply a coat of primer to the wall. Doing this will help the adhesive bond to the wall and provide a smooth surface for the slat panels to adhere to.
- Allow the primer to dry completely before moving on to the next step.
🔨 Pro tip: If the wall has imperfections you can't smooth out by sanding, consider using textured wallpaper or paint to add dimension to the wall.
Installing the slat panels for your DIY accent wall
- Measure the wall to determine the number of slat panels needed. Mark off the area where you want to install the slat panels using a pencil and level.
- Apply a strip of adhesive to the back of the first slat panel. Apply the adhesive evenly, using enough to create a strong bond between the panel and the wall.
- Carefully position the slat panel onto the wall, aligning it with the level marks. Press the panel firmly onto the wall to ensure full adhesion.
- Repeat this process with each additional slat panel, aligning them carefully with the last panel. Use nails to provide additional support and stability, if necessary.
- After installing all the slat panels, use caulk to fill in the gaps between the panels and the wall. Allow the caulk to dry completely before moving on to the next step.
Four tips for ensuring accuracy and precision:
- Measure twice, and cut once. Double-check your measurements before cutting the slat panels to ensure they fit perfectly.
- Use a level to ensure the slat panels are installed evenly and straight.
- Cut slat panels to the appropriate size and shape using a saw or other cutting tool, and sand the edges smoothly.
- If you're installing slat panels in a pattern or design, create a template or guide to ensure consistency and accuracy throughout the installation process.
With these tips and instructions, you should be able to install your slat panels with ease and precision, resulting in a beautiful and high-end accent wall.
Finishing the project
After installing all the slat panels and any gaps are filled in with caulk, it's time to finish the project.
This step involves filling in nail holes and seams, sanding and painting the slat panels, and adding any finishing touches to enhance the final look.
Filling in nail holes and seams
After installing the slat panels, you may notice small nail holes or gaps between the panels. To fill in these imperfections:
- Use a spackle or joint compound.
- Apply a small amount to the hole or opening, then use a putty knife to smooth it out.
- Allow the mixture to dry completely, then sand the surface until smooth.
Sanding and painting the slat panels
Before painting the slat panels, use a sanding block to smooth out any rough edges or surfaces. This step will ensure a smooth and even finish.
After sanding the panels, use paint, brushes, or rollers to apply the finishing touches to your accent wall. Depending on your desired finish, you may need to apply multiple coats of paint to achieve the desired look.
There are also acoustic slat wood pieces that come pre-finished and do not have to go through the sanding and smoothing process. Posh Wood is an example of pre-finished slat panels ready for installation.
Decorating tips to enhance the final look
Consider adding some decorative elements to enhance the final look of your accent wall.
Hang artwork or photographs on the wall, or add shelving to display decorative objects or plants.
Also, consider painting the other walls in the room a complementary color to create a cohesive and stylish look.
Budgeting and cost-saving tips
While slat panels can be a cost-effective option for creating an accent wall, there are ways to save even more money on your project. Here are some tips for finding affordable slat panels and alternative options for achieving a high-end look on a budget:
- Look for sales and discounts at home improvement stores. Many retailers offer seasonal discounts or clearance sales that can help you save money on slat panels.
- Check online marketplaces such as Amazon or eBay for discounted slat panels. You may find good deals on bulk orders or discontinued styles.
- Consider using alternative materials such as MDF or plywood to create a similar look. These materials can be less expensive than slat panels but may require more preparation and finishing work.
- Experiment with different paint or staining techniques to create a custom look. You can achieve a high-end look using metallic or textured paints or creating a pattern or design on the wall.
Follow these steps to create a stunning accent wall on a budget without sacrificing style or quality.
Start Your DIY Project with Posh Wood
Creating a high-end-looking accent wall with slat panels is a great way to add personality and style to any room.
By following our guide and using our budgeting and cost-saving tips, you can transform any space in your home without breaking the bank.
Posh Wood offers high-quality and affordable slat panels for DIY accent wall projects.